Friday, February 26, 2010

How to make a wipe off board

I have been in need of a small wipe off board for some time now. My husband and I want to start memorizing a scripture a week for part of our Family Home Evening. I had this exact same idea in my head, but it wasn't until I saw it made on my new favorite blog, Shanty2Chic that I decided to make it!

Materials Needed:
-Picture frame
-Paint
-Fabric, sized to fit your picture frame
-Spray adhesive
-Vinyl Lettering, optional
-Wipe off markers

1. If your frame needs painted, paint it. I cheated and bought one this time, it was the perfect size I needed, and color!
2. Cut your fabric to fit the size of your frame. My frame shown is 5x7.
3. Using spray adhesive, spray it onto the back part part of the pic frame (the part that would be touching the glass).
4. Place the fabric onto the side of cardboard with the spray adhesive. I used burlap, but this would be very cute with fabric as well!
5. Put the frame back together.
6. If you chose to put vinyl on, place that on the glass.
7. You're now the new proud owner of a super cute wipe off board!

We put ours on our desk, since we are always at the computer! That makes for a great location, where we will always see our quote. I think these would look super cute on a wall in a much bigger size!!! For the vinyl, a calendar would be cute, a Family last name, or your kids names, a cute little animal....the possibilities are endless!

Please share this blog with your friends, and if you aren't already, become a follower. Also become a fan on facebook! Have a great weekend!

-Melinda

Thursday, February 25, 2010

A Trip to the DI...gone well

Yesterday my friend Jacalyn and I went to the DI. We have been seeing all of these cute craft blogs lately , and seeing what all of these crafty people made with other people's junk inspired us! Haha! I purchased these 3 books at DI for $1 each...with the idea of revamp in my head!!!
I spray painted them black (along with some other DI finds...pics of those items coming soon), I also painted the book pages.
I then chose scrapbook paper that matched my home decor.
If you'd like you can skip the painting and go straight to mod podge and paper!!! This will make for a very quick project! I cut the paper to fit each side of the books. I then mod podged the paper, then with double sided tape, I stuck the paper on to the books.
I added a little bit of hod podge and I was done! I bought the handle at Lowe's for about $1.50. These look great on our desk!!!


Friday, February 19, 2010

Enrichment Activity

A few weeks ago I was asked to come up with an Enrichment craft....The theme was on making the Temple a priority in our lives...So this is what I came up with...
I found this frame for $1 at Dollar Tree. I spray painted it then sanded the edges. The I placed the vinyl on clean glass, placed ribbon on the frame, then glued the glass into the frame. Very cute and simple! Right now I currently have the Las Vegas Temple, Mesa AZ Temple, SLC Temple, and Idaho Falls. Cost is $3.50 for 5x7 vinyl, and $4.50 for 8x10 vinyl. Let me know if you would like these for an enrichment night =)

Tuesday, February 16, 2010

Got frames you plan on getting rid of because you don't like them anymore??

I sure did! A while back I saw a really cute family room decoration at a craft show being sold for near around $40! It was made with picture frames and vinyl lettering... since I have a machine, I figured, I should make one! I had gone to many stores searching for cute cheap frames that fit our "medical school, student loan budget" and the cheapest ones that I liked were $10 a frame! To spell the word "family" that would cost me about $60! That's a little costly for a decoration for us at this time...so I went looking through some old frames and found that I had 2 each of 3 different sizes...perfect! So I got to work!

I took 2 each of 8x10, 5x7 and 4x6 picture frames that I already had....I believe they were like $2 many years ago at wal-mart. I had bought these when we were first married because that was what was in our "college budget." I just took some acrylic paint and painted all of them black. I didn't sand them first.
Once they were painted, I then sanded them...I like how the old paint colors showed through on the edges, giving it a little bit more color!
I then gave them a coat of mod podge, so that way way these will clean up easily when I dust them!
Once the mod podge was dried, I took a hot glue gun, and glued in the glass, you could also use glass glue...I just used hot glue because that's what I had...it was later in the evening and I wanted this project done!!!
After I glued the glass in, I then placed the vinyl on the glass! Here is the finish project!
I love how it's no longer bare above my tv!!!
If you would like to order vinyl for this project, contact me at laniercreations@gmail.com!

Friday, February 12, 2010

Sign Orders

Here are some of the sign orders that I had for Christmas or made for gifts.

My Grandpa makes great model Lighthouses, so I made him this sign...
This was ordered for a wedding gift...I just love the red, black, and white
Someone ordered this for a Christmas gift...these are individual 8x10 wooden signs being hung with ribbon
Another order I had...I like this quote...
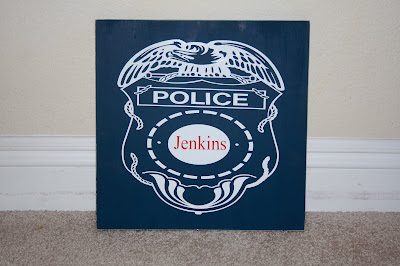
This is perfect for a Police Officer...
This was another order for a wedding gift, I just love the buttermilk yellow with the chocolate brown vinyl...
Cute saying for a grandparents home...
Every Grandparent deserves one of these =)
I love the burgundy on white....perfect for the Laundry room!
My friend had me make this for her wedding reception...
8x20 sign hung with ribbon for a nursery...
To make a sign order, contact me at laniercreations@gmail.com!

Vinyl on Tiles

Christmas was a busy time of year for me, which is one of the reasons I am playing catch up now! Here are some of the tiles that I did for custom orders.

Thin ribbon jazzed up this 6x6 tile...
I love the thick ribbon on these 12x12 tiles...

Las Vegas Temple...
Idaho Falls Temple...
A perfect President Monson quote...

Wall Vinyl

Here are some current wall vinyl orders I have done. Some images I purchased from other websites, and some I created myself.


Thursday, February 11, 2010

Vinyl Lettering for a Business Office

Back in the beginning of December I did some vinyl lettering for an office building! It has a hom-ey (that's not quite a word) feel to it. Here are the sayings I did.


For vinyl lettering for an office building, contact me at laniercreations@gmail.com!

Vinyl Lettering for a Wedding

Back in November...(wow am I behind!) my best friend got married! She asked me to do some vinyl lettering for her wedding! Here's what I did!

Initials on candy jars for a candy buffet...

Love is sweet...take a treat sign for the buffet table...


Las Vegas Temple with the couples last name and wedding date, marriage and love definition signs...

lettering for the card holder...
I think it all turned out quite nicely! If you are interested in lettering for any special event, contact me at laniercreations@gmail.com!